

Cold Weather Camping Guide
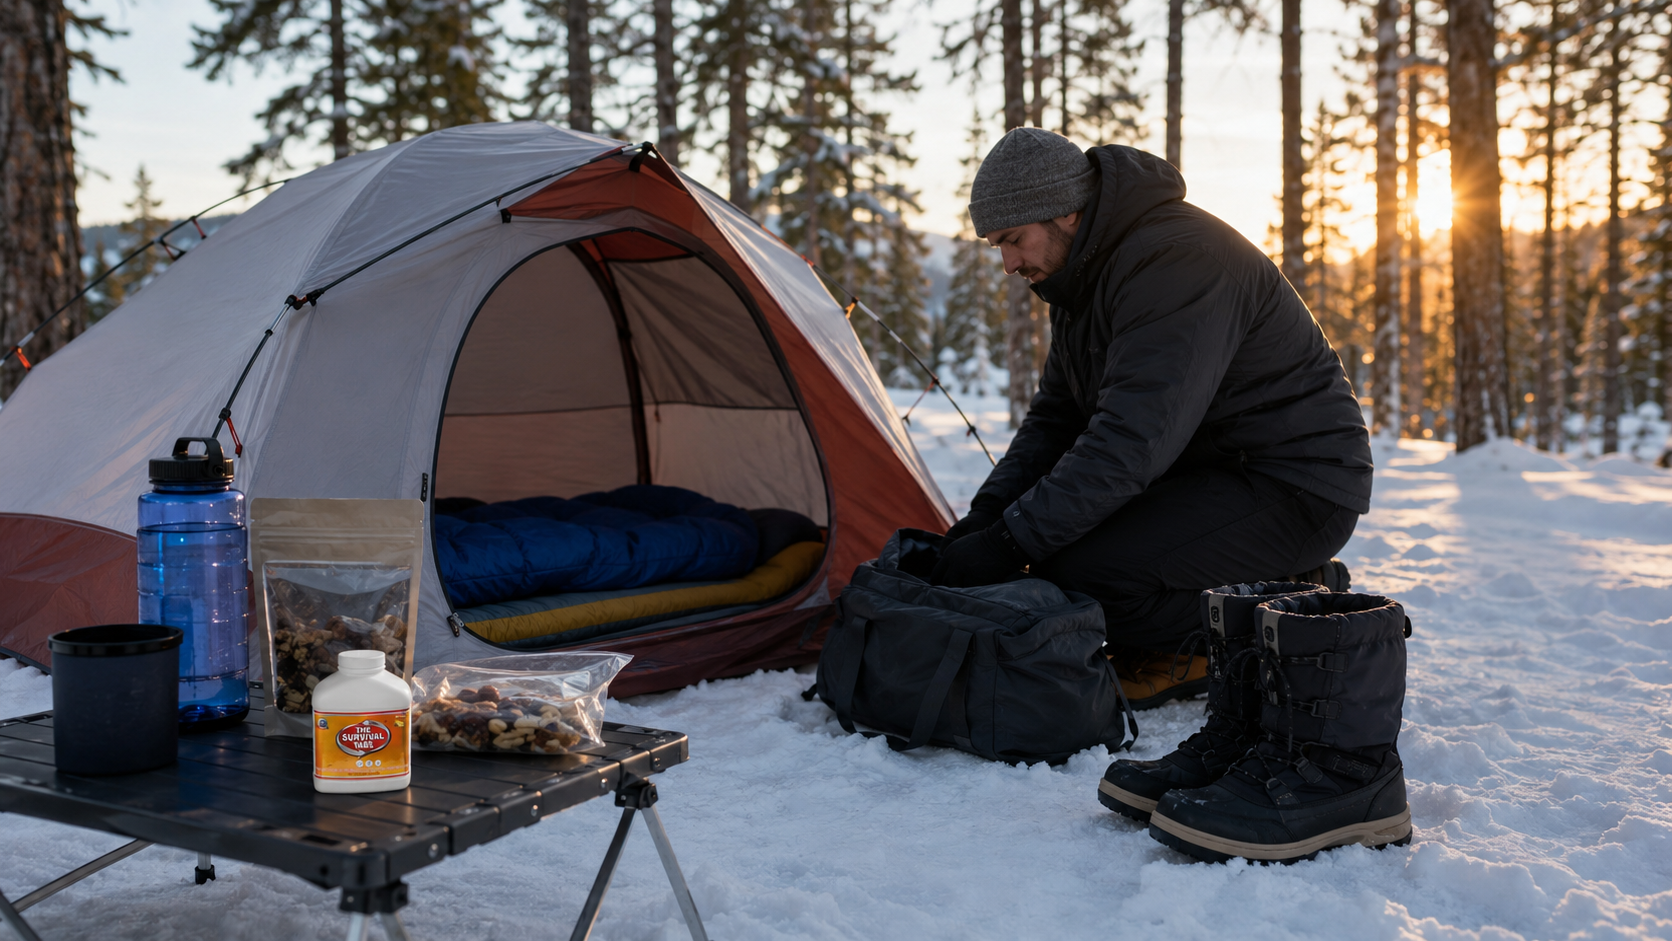
A safety-first system for planning, traveling, sleeping, cooking, and turning around in cold conditions
Cold-weather camping can be rewarding, but low temperatures amplify ordinary mistakes. Wet clothing, wind, fatigue, poor shelter ventilation, delayed setup, dehydration, and an optimistic route plan can become emergencies quickly.
This guide helps campers make conservative decisions. It does not replace local forecasts, land-manager rules, avalanche education, professional instruction, medical care, or manufacturer directions.
The Core Safety Standard
Choose conditions, locations, companions, and equipment that leave a wide safety margin. Turn around or cancel when the group cannot stay warm, dry, oriented, hydrated, and able to leave without rescue.
Non-Negotiable Stop Rules
* Do not begin or continue when an official warning, closure, avalanche forecast, wildfire restriction, road condition, or land-manager instruction makes the trip unsafe.
* Do not enter avalanche terrain without appropriate training, a current local forecast, suitable partners, and the required rescue equipment.
* Do not cook, burn fuel, or operate a heater inside a tent, vehicle, snow shelter, or other enclosed sleeping space.
* Do not use charcoal, grills, generators, or unvented combustion devices inside or near enclosed shelters.
* Do not rely on a phone as the only navigation or communication method.
* Do not continue after persistent shivering, confusion, fumbling, slurred speech, unusual drowsiness, numb waxy skin, or loss of coordination appears.
* Do not thaw a frostbitten area when it could refreeze.
* Do not rub frostbitten tissue or warm it with direct high heat.
* Do not separate from a person who may be hypothermic or impaired.
* Do not exceed the least-experienced participant’s verified ability.
* Do not treat emergency food tablets as the sole food plan for a cold-weather trip.
* Do not promise that any sleeping bag, tent, stove, battery, or clothing system is safe at a specific temperature without verified testing and appropriate use.
What This Guide Covers
Use this guide to build a complete trip system rather than buying isolated pieces of gear.
* Go-or-no-go decisions and conservative trip scope.
* Weather, wind chill, daylight, road, and avalanche checks.
* Group planning, route cards, check-ins, and emergency exits.
* Layering, moisture control, footwear, and spare clothing.
* Sleep-system, shelter, and campsite decisions.
* Water, food, stove, fuel, and carbon-monoxide safety.
* Recognition and immediate response for hypothermia and frostbite.
* Planning for children, older adults, disabilities, medical needs, and pets.
* Low-tech backups, turnaround triggers, and post-trip review.
Decide Whether the Trip Should Happen
Cold-weather competence begins with choosing a trip that the group can safely complete under worse-than-expected conditions.
* Review the point forecast for the exact route and elevation, not only the nearest town.
* Check expected low temperature, wind, precipitation, visibility, snow accumulation, and timing of fronts.
* Check wind chill and recognize that wind can increase heat loss from exposed skin.
* Confirm sunrise, sunset, and the time required to establish camp before dark.
* Check current road conditions, trail access, parking restrictions, chain rules, and gate closures.
* Check land-manager alerts, permits, camping restrictions, fire rules, and seasonal closures.
* Check the local avalanche forecast when the route could enter, cross, or lie below avalanche terrain.
* Identify an easier alternate route and a non-camping fallback.
* Cancel when the forecast, access, group condition, or equipment margin is inadequate.
* Tell every participant that turning around is a successful safety decision.
Use a Margin, Not a Threshold
A temperature rating or forecast number is not a guarantee. Wind, humidity, wetness, altitude, fatigue, food intake, shelter setup, individual physiology, and product testing methods all affect comfort and safety.
* Plan for temperatures below the forecast low.
* Plan for slower movement and longer camp chores.
* Keep dry insulation reserved for camp and sleep.
* Carry enough capacity to leave early or wait safely for daylight.
* Reduce route length when snow, ice, darkness, or heavy packs increase travel time.
Build a Trip Plan Others Can Use
Leave a written plan with a responsible contact who is not on the trip.
* Names, ages, and relevant medical or accessibility information.
* Vehicle description, license plate, and parking location.
* Exact trailhead, route, campsite area, and planned alternates.
* Departure time and expected return or check-in time.
* Turnaround time and overdue-response instructions.
* Land-manager and local emergency contact information.
* Communication devices and identifiers.
* Emergency contacts for every participant.
* Instructions not to wait indefinitely before reporting the group overdue.
Group Roles
* Name a trip leader, but require every participant to speak up about cold, fatigue, pain, fear, or equipment problems.
* Use a buddy system for face, ears, fingers, behavior, and coordination checks.
* Assign navigation, weather, water, and shelter tasks without making one person indispensable.
* Keep the group together unless a genuine emergency requires a trained response.
* Set check-in intervals before conditions become difficult.
* Never shame a person for requesting a stop or turnaround.
Clothing: Manage Heat and Moisture
The goal is not to feel hot while moving. The goal is to stay dry enough to remain warm when activity stops.
* Use a moisture-managing base layer appropriate to the conditions.
* Add insulating layers that can be adjusted without unpacking the entire bag.
* Use a wind- and precipitation-resistant outer layer suited to the forecast.
* Protect head, face, neck, hands, and feet.
* Carry spare dry socks, gloves or mittens, hat, and base layers in waterproof packaging.
* Avoid clothing that restricts circulation or movement.
* Change wet clothing promptly in a protected location.
* Vent or remove layers before sweating heavily.
* Add insulation before a break, not after becoming chilled.
* Keep sleep clothing dry and separate from travel clothing.
Footwear and Hands
* Use insulated, weather-appropriate footwear with room for socks and circulation.
* Prevent snow and water from entering boots where conditions warrant gaiters.
* Carry traction equipment only when trained to fit and use it for the route.
* Check feet for numbness, blisters, pressure points, and moisture.
* Use a glove system that allows necessary tasks without prolonged bare-hand exposure.
* Carry a dry backup for the handwear most likely to become wet.
* Do not place frozen or numb skin against stoves, fires, hot water bottles, or chemical warmers.
Shelter and Campsite Selection
Follow land-manager rules and manufacturer instructions. A winter campsite must avoid more than wind and cold.
* Arrive with enough daylight and physical reserve to build camp safely.
* Avoid avalanche paths, runout zones, cornices, loaded slopes, and terrain traps.
* Avoid dead branches, unstable trees, icefall, rockfall, flood channels, and wind-exposed ridges.
* Consider drifting snow that could block vents, doors, or exits.
* Choose a surface and anchoring method appropriate to snow, ice, frozen soil, and wind.
* Keep exits identifiable and usable after snowfall.
* Maintain the ventilation required by the shelter manufacturer.
* Do not seal vents to conserve heat.
* Keep ignition sources, fuel, and hot equipment away from fabric and sleeping materials.
* Store food and scented items according to local wildlife rules.
* Mark hazards and guy lines so they remain visible in low light.
Snow Shelters
* Use snow shelters only with appropriate training and stable conditions.
* Provide ventilation and monitor it for blockage.
* Keep an exit and a tool accessible from inside.
* Never depend on an untested snow shelter as the only life-safety option.
* Do not occupy a shelter under unstable snow, over water, near plowed roads, or where machines may travel.
* Treat collapse, ventilation, carbon-monoxide, and disorientation as serious hazards.
The Sleep System
A sleep system includes ground insulation, bag or quilt, clothing, shelter, moisture management, and the user’s condition.
* Use ground insulation appropriate to frozen ground or snow.
* Confirm that pads stay together and do not leave cold gaps.
* Choose sleeping equipment with a conservative margin for the person and conditions.
* Understand whether a published rating describes comfort, limit, or survival testing.
* Keep insulation dry during travel and setup.
* Fluff and protect loft before sleeping.
* Use dry sleep clothing and a dry hat.
* Do not breathe into the sleeping bag; moisture can reduce insulation.
* Manage condensation through ventilation.
* Keep required medication, light, communication, and exit footwear reachable.
* Do not place a leaking hot-water container in the sleep system.
* Check children and vulnerable campers directly rather than asking only whether they feel cold.
Before Sleep Checklist
* Eat and drink enough for the person’s needs.
* Use the bathroom to reduce unnecessary nighttime exposure.
* Remove wet clothing.
* Loosen footwear or clothing that restricts circulation.
* Set ventilation and verify it is not obstructed.
* Put headlamp, spare light, boots, gloves, and emergency items where they can be reached.
* Agree on overnight checks and the response if someone cannot warm up.
* Know the fastest route to a vehicle, building, ranger station, or lower-risk location.
Food, Water, and Hydration
Cold can reduce thirst while activity and dry air continue to increase water needs. A frozen water system is not a water plan.
* Start hydrated and carry immediately usable water.
* Protect containers and filters from freezing according to manufacturer directions.
* Carry a backup treatment method appropriate to the source and temperature.
* Use only safe water for drinking and food preparation.
* Plan additional fuel and time if snow must be melted.
* Do not eat snow as the primary hydration method.
* Add a small amount of liquid before melting snow when required by safe stove practice.
* Keep food accessible so eating does not require a full unpack in severe weather.
* Use familiar foods that remain edible in the expected temperature.
* Include carbohydrates, fats, protein, and adequate total energy according to individual needs.
* Plan for allergies, diabetes, swallowing difficulty, medication timing, and other dietary or clinical needs.
* Store and handle food safely even when the air feels cold.
* Pack out waste and follow wildlife-resistant storage rules.
Survival Tabs in a Cold-Weather Food Plan
Survival Tabs may be one compact component of an emergency food plan when product facts, serving information, dietary fit, and individual needs have been verified. They should not replace water, adequate calories, balanced meals, prescribed nutrition, or condition-specific medical planning.
Stoves, Fuel, Fire, and Carbon Monoxide
Combustion creates carbon monoxide and fire risk. Cold, wind, and snow do not make enclosed cooking safe.
* Cook outside and away from tents, snow shelters, vehicles, and enclosed vestibules.
* Follow stove, fuel, cookware, and shelter manufacturer instructions.
* Use the correct fuel and compatible components.
* Inspect connections, seals, hoses, and bottles before the trip.
* Keep fuel away from flames, hot surfaces, children, and pets.
* Stabilize the stove on a suitable noncombustible surface.
* Protect the cooking area from tipping and uncontrolled foot traffic.
* Never use a stove or flame to heat a sleeping shelter.
* Never use charcoal inside a tent, vehicle, cabin, or other enclosed space.
* Do not run a vehicle engine to heat sleepers in an enclosed or snow-blocked area.
* Recognize headache, dizziness, weakness, nausea, confusion, chest pain, and altered consciousness as possible carbon-monoxide symptoms.
* Move to fresh air and seek emergency help for suspected carbon-monoxide exposure.
* Do not rely on smell to detect carbon monoxide.
* Extinguish equipment fully and let it cool before storage.
Campfire Limits
* Check current fire restrictions and whether fires are permitted.
* Use established sites where required.
* Keep the fire small and continuously attended.
* Do not use gasoline or other accelerants.
* Keep tents, clothing, fuel, and sleeping gear away from heat and sparks.
* Extinguish the fire completely according to land-manager guidance.
* Do not treat a fire as the group’s only warming plan.
Navigation, Light, and Communication
Snow can erase trails and landmarks. Batteries may deliver less usable capacity in cold conditions.
* Carry a map and compass and know how to use them.
* Carry a charged navigation device with offline mapping as a supplement.
* Protect electronics and spare batteries from moisture and extreme cold as directed.
* Carry at least two independent light sources.
* Start with fresh or fully charged batteries.
* Know where cellular coverage is absent or unreliable.
* Consider an appropriate satellite communication or emergency-signaling device.
* Understand the device, subscription, check-in, and SOS procedure before departure.
* Do not promise that any device guarantees rescue.
* Leave enough daylight reserve for navigation and camp setup.
* Stop and regroup early when route confidence declines.
Cold Injury: Recognize Problems Early
Cold illness can impair judgment, making self-assessment unreliable. Use buddy checks and act on early changes.
* Persistent or violent shivering.
* Exhaustion or unusual fatigue.
* Fumbling hands or loss of coordination.
* Confusion, memory problems, poor decisions, or unusual behavior.
* Slurred speech or drowsiness.
* Numb, pale, white, grayish-yellow, firm, or waxy skin.
* Pain, tingling, or loss of sensation in exposed areas.
* Reduced ability to walk safely.
* Shivering that stops while the person remains cold.
* Slow or difficult breathing, collapse, seizure, or unresponsiveness.
Suspected Hypothermia
* Treat suspected hypothermia as a medical emergency.
* Call emergency services or activate the appropriate rescue plan.
* Move the person gently to shelter from wind and wet conditions.
* Remove wet clothing when it can be done without dangerous exposure.
* Insulate the person with dry layers and warm the center of the body.
* Keep the person horizontal and handle gently when severe hypothermia is possible.
* Do not give alcohol.
* Do not leave the person alone.
* Do not force food or drink on a person who is confused, drowsy, vomiting, or unable to swallow safely.
* Follow dispatcher, rescue, or medical instructions.
Suspected Frostbite
* Get out of the cold and protect the area.
* Seek medical evaluation.
* Remove constricting jewelry or wet items when safe.
* Do not rub, massage, or walk on a frostbitten foot unless unavoidable for immediate safety.
* Do not use a stove, fire, heating pad, radiator, or other direct high heat.
* Do not break blisters.
* Do not thaw tissue if refreezing is possible.
* Follow professional instructions for controlled warming.
Avalanche Boundaries
This guide does not teach avalanche travel or rescue. Snow-covered terrain requires location-specific forecasting, education, equipment, and practiced partners.
* Check the current local avalanche forecast before entering mountain snow terrain.
* Read the danger rating, avalanche problems, elevation bands, travel advice, and weather discussion.
* Recognize that a forecast is a starting point, not a guarantee.
* Do not enter avalanche terrain without appropriate education.
* Carry rescue equipment only when trained to use it.
* Practice companion rescue before the trip.
* Avoid terrain you cannot confidently classify.
* Choose lower-risk routes when forecast or group uncertainty exists.
* Turn around for observed cracking, collapsing, recent avalanches, rapid loading, or other warning signs.
* Remember that runout zones can reach flatter terrain.
Children, Older Adults, and Medical Needs
Cold exposure affects people differently. The plan must match the person who needs the greatest margin.
* Ask a clinician about condition-specific cold, altitude, exertion, and medication concerns where appropriate.
* Carry medication in the temperature range required by its label.
* Protect devices, inhalers, insulin, batteries, and other supplies from freezing as directed.
* Build shorter routes and earlier turnaround times.
* Use direct skin, behavior, hydration, and coordination checks.
* Provide accessible shelter entry, sleeping setup, toileting, and emergency exit.
* Carry communication methods usable by the participant.
* Never use a child’s silence as proof of comfort.
* Have a warm, immediate retreat option for beginners and vulnerable campers.
* Do not take a participant whose essential needs cannot be supported under the forecast conditions.
Pets
A pet’s presence adds thermal, access, wildlife, waste, and evacuation requirements.
* Confirm the site and route allow pets.
* Ask a veterinarian about cold tolerance, health conditions, paws, coat, food, and medication.
* Carry species-appropriate insulation and a dry sleeping arrangement.
* Protect paws from ice, chemicals, sharp crust, and prolonged exposure.
* Carry water and food rather than relying on snow or scavenging.
* Use control appropriate to wildlife, cliffs, thin ice, and other users.
* Pack out waste as required.
* Turn around for limping, lifting paws, shivering, lethargy, disorientation, or inability to stay warm.
* Do not use human medication or warming products on an animal unless a veterinarian directs it.
Turnaround Triggers
Agree on triggers before the group becomes cold, tired, or invested in reaching a destination.
* Weather deteriorates earlier or faster than forecast.
* Wind, snowfall, visibility, or temperature exceeds the group’s margin.
* The group is behind the planned turnaround time.
* A person or animal cannot stay warm and dry.
* Essential clothing, shelter, stove, water, navigation, or communication equipment fails.
* The route becomes uncertain.
* Snow, ice, water, wildlife, fire, or avalanche conditions cannot be managed.
* A participant becomes unusually quiet, confused, clumsy, exhausted, or numb.
* Camp cannot be established safely before dark.
* The exit route may close or become unsafe.
Emergency Night Out
If travel becomes more dangerous than stopping, use the group’s trained emergency plan and seek professional direction when possible.
* Move out of immediate avalanche, falling-tree, flood, traffic, and other objective hazards.
* Communicate location and status through the best available method.
* Protect the group from wind and wetness.
* Insulate everyone from the ground.
* Keep people together and monitor cognition, coordination, and skin.
* Use lights and signaling equipment conservatively.
* Maintain shelter ventilation.
* Do not introduce combustion into an enclosed shelter.
* Ration batteries deliberately, but do not delay a necessary emergency call.
* Follow instructions from emergency services or land managers.
First-Trip Progression
Build experience in controlled steps.
* Test clothing, shelter, stove, water, and sleep systems near home.
* Practice setup with gloves and in darkness.
* Complete a cold day trip with an easy retreat.
* Camp at a managed site near a warm vehicle or building.
* Choose stable weather and a short route for the first overnight.
* Go with an experienced and safety-minded partner or qualified instructor.
* Review what became wet, cold, slow, difficult, or confusing.
* Change one part of the system at a time and test it again.
Post-Trip Review
A useful debrief converts discomfort and near misses into safer future decisions.
* Record the actual temperature, wind, precipitation, and snow conditions.
* Note when each person became cold, wet, hungry, tired, or anxious.
* Inspect insulation, shelter, footwear, stove, fuel, water, and batteries.
* Dry, clean, repair, and store equipment according to manufacturer directions.
* Replace used first-aid and emergency supplies.
* Document route, communication, access, or check-in failures.
* Report hazards or incidents to the appropriate land manager.
* Adjust future route length, turnaround time, and safety margin.
* Seek medical care for persistent numbness, pain, skin changes, breathing issues, confusion, or other concerning symptoms.
Frequently Asked Questions
Can a sleeping-bag rating guarantee comfort?
No. Ratings use defined test methods and cannot account for every person, pad, shelter, clothing system, wind, moisture, food intake, or medical condition. Use a conservative system and real-world testing.
Is it safe to cook in a tent vestibule during a storm?
This guide does not recommend enclosed or vestibule cooking. Carbon monoxide, fire, fuel, and ventilation risks can become fatal. Use an outdoor cooking plan or a no-cook fallback.
Can I melt snow for all of my water?
Only with enough safe fuel, time, cookware, and backup capacity. Use clean snow, follow treatment requirements, and carry immediately usable water.
Does a phone replace a map, compass, or satellite communicator?
No. Phones can fail because of cold, moisture, impact, battery loss, coverage gaps, or software problems.
Should I stop shivering before I worry?
No. Shivering can be an early warning. Confusion, clumsiness, slurred speech, unusual fatigue, and stopped shivering in a cold person are more serious signs requiring urgent action.
Can hand warmers treat frostbite?
Do not use direct high heat on numb or frostbitten tissue. Protect the area, prevent refreezing, and seek medical guidance.
Is a campfire enough for emergency warmth?
No. Fires may be prohibited, difficult to start, dangerous in wind, or unavailable above tree line. The clothing, shelter, insulation, food, water, and exit plan must work without one.
Do I need avalanche training if I stay on a trail?
A trail can cross or lie below avalanche terrain. Check local forecasts and terrain information, and obtain appropriate education before winter backcountry travel.
Can children use adult cold-weather gear?
Only if it fits and functions safely. Poor fit can reduce insulation, circulation, mobility, and supervision. Use age-appropriate equipment and a larger safety margin.
Is winter camping appropriate during an emergency?
Camping is not automatically safer than remaining in a sound building or using an official shelter. Follow authorities and compare shelter, heat, access, medical, and evacuation risks.
Professional Review Required Before Publication
Because this guide touches life-safety systems, final publication should receive appropriate specialist review.
* Cold-weather outdoor educator or experienced winter-camping professional.
* Wilderness medicine or emergency medical reviewer.
* Fire-safety and carbon-monoxide reviewer.
* National Weather Service or meteorological subject-matter review where weather claims are localized.
* Avalanche professional for avalanche boundaries and terminology.
* Accessibility and disability preparedness reviewer.
* Pediatric and geriatric review where age-specific guidance is retained.
* Veterinary review for pet guidance.
* Legal and land-management review for permits, access, liability, and local rules.
* Product-compliance review for every Survival Tabs statement.
Official Sources
* National Park Service — Mount Rainier winter safety
* National Park Service — Yellowstone winter backcountry camping
* CDC — Preventing hypothermia
* CDC — Preventing frostbite
* CDC/NIOSH — Cold stress and cold-related illness
* National Weather Service — Cold weather safety
* National Avalanche Center — Avalanche forecasts and education
Official guidance, forecasts, restrictions, and product instructions can change. Recheck the responsible agencies and the exact trip location before publication and before every outing.
Editorial Note
This guide intentionally excludes gear rankings, universal temperature promises, improvised heaters, enclosed cooking, untrained avalanche travel, hazardous firecraft, DIY medical treatment, and claims that a device, product, or food guarantees survival.