

Emergency Food Preservation Guide
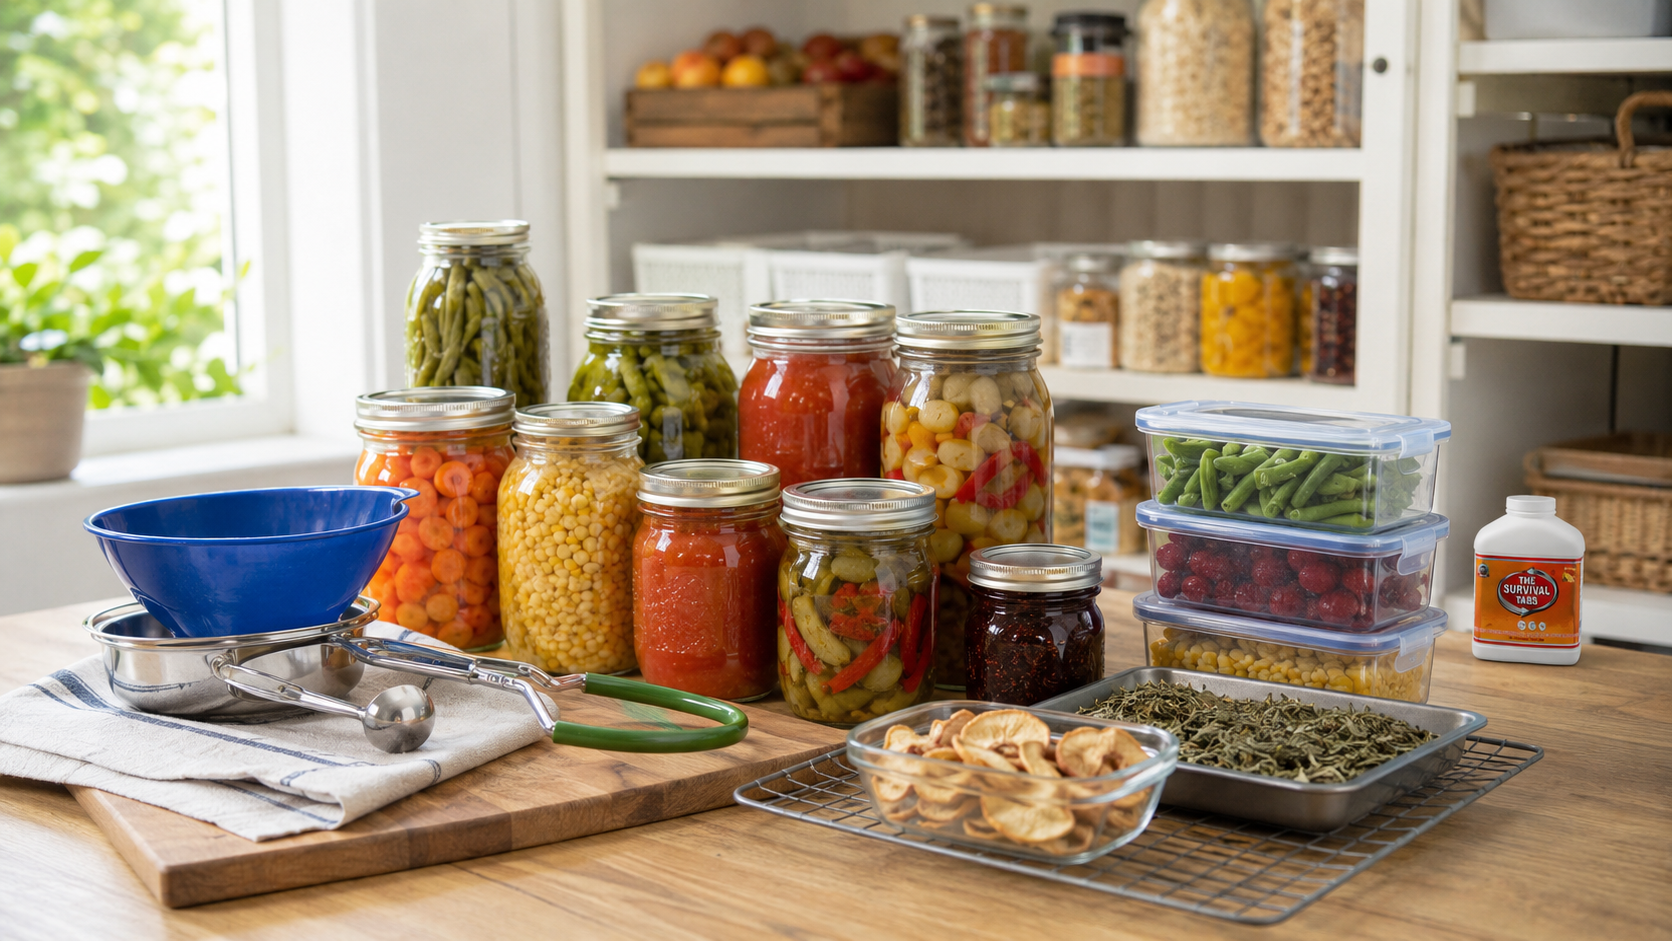
A safety-first household guide to choosing, preparing, storing, inspecting, and using preserved food during normal times and emergencies.
Preserving food can reduce waste and strengthen household resilience, but preservation is not one interchangeable technique. Freezing, drying, canning, pickling, fermenting, curing, and refrigeration control different hazards in different ways. A method is safe only when it matches the food, equipment, recipe, processing conditions, and storage plan.
This guide explains how to build a practical preservation system without improvising safety-critical formulas. It does not replace a tested recipe, a current appliance manual, local public-health guidance, or advice from a qualified Cooperative Extension food-preservation specialist.
Quick answer
For emergency planning, begin with commercially shelf-stable food and ordinary refrigerated or frozen food management. Add home preservation only after choosing a tested method from an authoritative source and confirming that you have the correct equipment, ingredients, processing time, pressure or temperature, altitude adjustment, packaging, and storage conditions.
* Use only current, tested preservation instructions for the exact food, jar size, preparation style, and method.
* Pressure-can low-acid foods; do not substitute boiling-water canning.
* Treat drying as controlled moisture removal, not as leaving food in warm air until it seems dry.
* Freeze food promptly in suitable packaging and maintain a dependable cold chain.
* Label every batch with the food, method, preparation details, and packing date.
* Discard suspect food without tasting it.
* During an outage, follow official time-and-temperature guidance rather than appearance or smell alone.
What this guide covers
* Choosing the safest preservation method for a household goal.
* Planning around electricity, fuel, clean water, equipment, climate, storage space, and mobility.
* Freezing, drying, tested home canning, refrigeration, pickling, fermentation, curing, and smoking at a decision-making level.
* Safe handling before, during, and after processing.
* Labeling, inventory, rotation, inspection, outage decisions, and disposal.
* Accessibility, children, pets, shared kitchens, and community distribution.
* Emergency limits and professional-review points.
What this guide does not provide
* An untested canning recipe or a universal processing time.
* A substitute for the USDA Complete Guide to Home Canning or a current tested recipe.
* Wild-game butchering, beaver, wild boar, squirrel, venison, or pheasant recipes.
* Wild plant, mushroom, insect, or seafood identification.
* Instructions for improvised pressure vessels, vacuum chambers, smokehouses, solar dehydrators, or fermentation systems.
* Medical advice or a way to make spoiled food safe.
* Permission to sell, donate, or serve home-preserved food where local rules restrict it.
1. Build the preservation plan before buying equipment
Define the purpose
* Reduce routine household food waste.
* Store seasonal garden produce.
* Maintain a rotating emergency pantry.
* Protect food during short outages.
* Prepare lightweight food for lawful, planned travel.
* Support a household member with a documented dietary need.
* Preserve a cultural recipe using a verified safe process.
A goal such as “store vegetables for a year without electricity” is not yet a method. Break it into food type, expected storage time, available utilities, container needs, safety controls, and who will use the food.
Assess constraints
* Reliable electricity and freezer capacity.
* Safe water for washing, preparation, and cooling where required.
* A stable stove or approved heat source.
* Ventilation and protection from burns and steam.
* Correct canner, dehydrator, thermometer, jars, lids, racks, and packaging.
* Altitude, because tested canning processes may require adjustment.
* Cool, dry, dark storage protected from pests and flooding.
* Time for preparation, processing, cooling, labeling, inspection, and cleanup.
* Physical reach, grip, vision, hearing, stamina, and cognitive demands.
* Local rules for shared kitchens, sales, donations, hunting, fishing, and wild foods.
Choose the lowest-complexity safe option
When two approaches meet the same need, prefer the one with fewer safety-critical steps and better verification. Commercially canned beans may be a better emergency choice than learning pressure canning during a crisis. Freezing may be simpler than canning when power is reliable. Drying may be useful when the food and tested method are appropriate.
2. Understand the major hazards
Microorganisms and toxins
Preservation must control the organisms and conditions relevant to the food. Some hazards are not visible, do not create an obvious odor, and cannot be detected by tasting. Improperly canned, preserved, or fermented food can support botulinum toxin formation.
* Never taste food to decide whether it is safe.
* Do not rely on a lid seal alone as proof that a process was safe.
* Do not assume old family instructions are safe because nobody remembers becoming ill.
* Do not lower salt, acid, sugar, time, pressure, or temperature in a tested safety-critical process unless the tested source explicitly permits the change.
* Do not use a recipe merely because it appears popular online.
Cross-contamination
* Wash hands before preparation and after handling raw meat, poultry, seafood, eggs, soil, waste, or pets.
* Clean and sanitize food-contact surfaces using suitable products and label directions.
* Separate raw animal foods from ready-to-eat foods.
* Use clean utensils, containers, towels, and packaging.
* Exclude anyone who is ill from food preparation when public-health guidance calls for it.
Chemical and physical hazards
* Use containers intended for food contact and for the chosen temperature and process.
* Do not reuse single-use packaging for hot filling or long storage unless the manufacturer permits it.
* Protect food from cleaners, fuel, pesticides, medicines, batteries, floodwater, smoke residues, glass fragments, rust, and pests.
* Discard containers that are cracked, badly corroded, leaking, bulging, or otherwise compromised.
* Follow equipment manuals and stop using damaged pressure canners, gauges, cords, seals, or heating elements.
3. Method-selection guide
Refrigeration
Refrigeration slows microbial growth but does not make perishable food shelf stable. It depends on continuous temperature control, clean handling, suitable containers, and timely use.
* Use an appliance thermometer.
* Limit door opening during an outage.
* Keep raw foods contained below ready-to-eat foods.
* Follow official storage and outage guidance.
* Discard food when safety limits have been exceeded or cannot be verified.
Freezing
Freezing is useful for many foods and generally preserves safety while food remains continuously frozen, although quality changes over time. Freezing does not reliably destroy all microorganisms.
* Freeze food promptly while it is in good condition.
* Use moisture- and vapor-resistant packaging designed for freezing.
* Remove excess air where appropriate without contaminating the seal.
* Package in household-sized portions so food thaws safely and is not repeatedly warmed.
* Label contents and packing date.
* Keep the freezer at the recommended temperature and verify it with a thermometer.
* Plan for outage monitoring and backup cold storage.
* Thaw using a safe method; do not leave perishable food at room temperature for extended periods.
Drying
Drying reduces available moisture. Safe results depend on food preparation, pretreatment where required, temperature, airflow, time, conditioning for some foods, and moisture-proof storage.
* Use a tested drying procedure for the specific food.
* Use a food dehydrator or another method specifically approved by the tested source.
* Cut pieces to the specified thickness for even drying.
* Do not crowd trays or block airflow.
* Rotate trays only as the equipment instructions recommend.
* Check for adequate dryness using method-specific criteria.
* Condition dried fruit when the tested procedure requires it.
* Cool dried food before packaging so condensation does not collect.
* Package in small quantities and protect from moisture, heat, light, oxygen, and pests.
* Inspect regularly for moisture, mold, insects, or package failure.
Meat and poultry jerky
Jerky requires special pathogen controls. Use current USDA or Cooperative Extension guidance, including the required heat treatment and safe dehydrator practices. Do not infer that a dry-looking strip is safe.
Boiling-water canning
Boiling-water canning is intended for tested high-acid foods and properly acidified foods. The exact recipe, jar size, headspace, processing time, elevation adjustment, cooling, and storage directions matter.
* Use a current tested recipe from USDA, the National Center for Home Food Preservation, or a qualified Cooperative Extension source.
* Use standard home-canning jars and compatible new lids as directed.
* Inspect jars for chips and cracks.
* Measure ingredients accurately.
* Do not thicken, puree, enlarge jar size, or change solid-to-liquid ratios unless the tested recipe permits it.
* Keep the required water level and a full boil for the complete adjusted processing time.
* Allow jars to cool undisturbed as directed.
* Check seals after the specified cooling period.
* Refrigerate and promptly use an unsealed jar, or reprocess it only as a tested source directs.
Pressure canning
Pressure canning is the only recommended home-canning method for low-acid foods such as most vegetables, meats, poultry, fish, and seafood. A small pressure cooker is not automatically a pressure canner.
* Use a tested recipe for the exact food and pack style.
* Use the canner type and minimum capacity required by the tested instructions.
* Have dial gauges checked as recommended by the manufacturer or Cooperative Extension.
* Vent the canner for the full required time before pressurizing.
* Use the correct pressure for canner type and altitude.
* Start timing only when the required pressure is reached.
* Maintain the required pressure for the full processing time.
* If pressure drops below the required level, follow the tested restart rule.
* Let the canner depressurize naturally; do not force cooling.
* Open the lid away from your face and hands to reduce steam burns.
Pickling and acidification
Acidified foods depend on a verified acid level and a tested ratio of food, liquid, and acid. Flavor substitutions are not automatically safety-neutral.
* Use vinegar of the acidity specified by the tested recipe.
* Do not dilute vinegar or reduce acid.
* Use bottled lemon juice when the recipe specifies it.
* Use the vegetable, cut size, jar size, and processing method named in the recipe.
* Treat refrigerator pickles as refrigerated food unless a tested canning process makes them shelf stable.
Fermentation
Fermentation is a controlled biological process, not simply leaving food sealed at room temperature. Salt concentration, temperature, oxygen exposure, cleanliness, time, and signs of failure can all matter.
* Use a tested formula and food-grade equipment.
* Measure salt and ingredients accurately.
* Keep food submerged or exposed as the tested method requires.
* Maintain the recommended temperature range.
* Do not seal a vessel in a way that creates an uncontrolled pressure hazard.
* Discard a batch when the tested source identifies mold, odor, texture, color, gas, or process deviations as unsafe.
* Refrigerate or process the finished food as instructed.
Curing and smoking
Curing and smoking animal foods require specialized control of temperature, time, salt, curing agents, humidity, airflow, and contamination. Smoke alone does not make perishable food shelf stable.
* Use only tested formulations and accurately measured curing ingredients.
* Do not improvise curing salts or substitute ordinary salt for a curing agent.
* Keep meat, poultry, fish, and seafood within required temperature controls.
* Use a calibrated food thermometer where required.
* Follow current USDA or Cooperative Extension guidance.
* Refrigerate or freeze the finished product unless a validated process specifically establishes shelf stability.
4. Unsafe methods and shortcuts to exclude
* Oven canning.
* Open-kettle canning.
* Dishwasher canning.
* Microwave canning.
* Solar canning.
* Using a pressure cooker when a tested pressure-canning process requires a pressure canner.
* Sealing jars without the required heat process.
* Changing jar size without a tested process.
* Guessing altitude adjustments.
* Dry canning low-moisture foods in jars using home heat treatment.
* Heating jars in an oven.
* Wax seals for products that require modern canning lids and processing.
* Adding aspirin or another untested preservative.
* Using smell, appearance, a popped lid, or a taste test as proof of safety.
* Trying to neutralize suspected botulinum toxin or spoilage at home.
* Feeding suspect food to animals or placing it where children, pets, or wildlife can reach it.
5. Prepare a safe workspace
* Read the complete tested process before starting.
* Gather every ingredient, container, tool, timer, thermometer, rack, and label.
* Confirm that the equipment is compatible and undamaged.
* Clear children, pets, and trip hazards from the hot-work zone.
* Provide stable lighting and ventilation.
* Keep pot handles controlled and cords away from water and edges.
* Arrange help for lifting full canners, hot trays, or heavy containers.
* Keep clean and dirty work zones separate.
* Prepare a plan for burns, broken glass, power loss, equipment failure, or an interrupted process.
6. Labeling and records
A preserved-food system is only as reliable as its records. A jar or bag with unknown contents, method, or age should not be treated as verified emergency food.
* Food name.
* Preparation style and important recipe identifier.
* Preservation method.
* Batch or lot identifier.
* Packing date.
* Required storage condition.
* Use-first or quality target from the tested source.
* Allergen information where relevant.
* Special handling after opening.
* Any deviation, interruption, or seal concern.
Keep a separate batch log for canning, drying, fermentation, curing, or community production. Record the tested source, equipment, jar or package size, processing conditions, altitude adjustment, yield, seal failures, and corrective actions.
7. Storage and rotation
* Store shelf-stable food in a cool, dry, dark location unless the tested source says otherwise.
* Keep food away from plumbing leaks, flooding, chemicals, heat sources, and direct sunlight.
* Do not store heavy jars where they can fall on people.
* Use restraints or low shelving in earthquake-prone locations.
* Protect packaging from rodents and insects without contaminating food.
* Keep aisles and exits clear.
* Place older verified stock where it will be used first.
* Inspect on a fixed schedule and after heat, freezing, flooding, earthquake, pest, or impact events.
* Rotate preserved foods into normal meals so the household knows how to use them.
8. Inspect before opening and before eating
Stop and discard without tasting when
* A jar is leaking, bulging, badly rusted, cracked, or spurts liquid or foam when opened.
* A lid is unsealed or the seal status is uncertain.
* Food has an unexpected odor, color, texture, mold, slime, gas, or container pressure.
* A package is wet inside when it should be dry.
* A dried-food package shows condensation, mold, or insect activity.
* A frozen or refrigerated food exceeded official time-and-temperature limits.
* The process was interrupted or the required time, temperature, acidity, salt, or pressure cannot be verified.
* The food contacted floodwater, sewage, chemicals, broken glass, or unsafe containers.
* The history of the food is unknown.
Do not taste suspect food. Keep it away from other food, people, animals, and food-contact surfaces. Follow local public-health or waste-disposal instructions when botulism or another serious contamination is suspected.
9. Power outages and emergencies
Before an outage
* Place appliance thermometers in the refrigerator and freezer.
* Freeze water containers or cold packs if space permits.
* Group frozen food to help it remain cold.
* Know where dry ice or safe cold storage may be available, but plan safe handling and ventilation.
* Keep a manual can opener.
* Store no-cook foods that do not depend on refrigeration.
* Maintain a written food-discard decision guide from an authoritative source.
* Protect records and labels from water.
During an outage
* Keep refrigerator and freezer doors closed.
* Track the start time and appliance temperatures.
* Do not place a generator, grill, or fuel-burning appliance indoors, in a garage, or near openings.
* Do not move food into unsafe outdoor temperatures where animals, sunlight, contamination, or temperature swings can affect it.
* Use the most perishable verified-safe food first.
* Separate questionable food so it is not served accidentally.
After an outage
Use current FDA or USDA guidance and actual time-and-temperature information. Do not rely on smell or appearance. When safety cannot be verified, discard the food.
* Document losses before disposal if an insurer or disaster program requires evidence and it is safe to do so.
* Clean and sanitize affected appliance surfaces.
* Discard food contaminated by floodwater or unsafe meltwater.
* Review which foods and systems failed.
* Replace vulnerable foods with simpler shelf-stable options where appropriate.
10. Water emergencies
Food preservation may require potable water for washing, ingredients, cooling, cleaning, and hand hygiene. A boil-water advisory, chemical contamination event, or loss of safe water can make normal preservation work unsuitable.
* Follow the exact public advisory.
* Do not assume boiling removes chemicals, fuel, salts, heavy metals, or toxins.
* Postpone optional preservation when safe water is unavailable.
* Protect stored food from contaminated water and sewage.
* Discard food and porous packaging exposed to floodwater unless an authoritative source explicitly permits salvage.
11. Households with additional needs
Accessibility
* Use large-print, high-contrast, tactile, or audio labels as needed.
* Place frequently used food within safe reach.
* Choose smaller containers to reduce lifting risk.
* Use timers with visual, audible, or vibrating alerts.
* Provide a seated preparation option.
* Ask another trained adult to handle pressure canners, boiling water, heavy trays, or sharp tools when needed.
* Keep emergency instructions available in the household’s preferred language and format.
Children and pets
* Create a child- and pet-free hot-work zone.
* Lock away curing agents, cleaners, fuels, sharp tools, and glass.
* Do not let children test seals, open swollen containers, or taste questionable food.
* Do not feed discarded preserved food to pets or livestock.
* Plan pet food separately; human preservation instructions do not automatically apply to animal diets.
Medical and dietary needs
* Do not alter safety-critical recipes to remove sugar, salt, acid, or other ingredients unless a tested alternative exists.
* Verify allergens and cross-contact risks.
* Maintain medically necessary foods in commercially labeled form when dependable ingredient and nutrition information is essential.
* Consult a clinician or registered dietitian for complex dietary needs.
* Do not present Survival Tabs or any single preserved food as a complete long-term diet.
12. Shared kitchens, gifts, donations, and sales
Food that leaves the household creates additional responsibility. Local laws may regulate processing, labeling, allergen disclosure, kitchens, inspections, sales, donations, and interstate distribution.
* Check current local and state requirements before producing food for sale or public distribution.
* Do not donate or gift a batch when the process record is incomplete.
* Provide storage and after-opening instructions.
* Identify allergens accurately.
* Use traceable batch labels.
* Do not make medical, survival, or shelf-life claims beyond verified evidence.
* Use a licensed or inspected facility when required.
* Stop distribution and contact the appropriate authority if a safety problem is discovered.
13. A practical household preservation workflow
Step 1: Select
Choose a specific food and a realistic storage goal. Confirm that a current tested method exists.
Step 2: Verify
Read the entire tested procedure. Confirm food type, preparation, container size, altitude, equipment, time, pressure or temperature, cooling, storage, and failure rules.
Step 3: Prepare
Set up the workspace, inspect equipment, wash hands, separate raw and ready-to-eat foods, and stage labels and records.
Step 4: Process
Follow the tested method exactly. Monitor every safety-critical condition and record interruptions.
Step 5: Cool or stabilize
Use the method’s specified cooling, conditioning, resting, venting, or refrigeration steps. Do not speed cooling in a way the tested method prohibits.
Step 6: Inspect
Check seals, dryness, packaging, temperature, and other method-specific success criteria at the required time.
Step 7: Label and store
Label the batch completely and place it in the correct storage environment.
Step 8: Rotate and review
Inspect on schedule, use older verified food first, practice normal meal use, and update the plan after any failure.
14. Low-cost priorities
* Buy appliance thermometers before specialty preservation gadgets.
* Use commercially shelf-stable staples as the emergency foundation.
* Add durable labels and a simple inventory sheet.
* Use tested freezing and drying methods for foods the household already eats.
* Borrow or use Cooperative Extension resources before buying expensive equipment.
* Have canner gauges checked where that service is available.
* Spend first on safe containers, verified equipment, clean storage, and training.
15. Common mistakes
* Starting with a complicated low-acid canning project.
* Using a social-media recipe with no authoritative test source.
* Assuming traditional, natural, ancient, or homemade means safe.
* Changing ingredients or jar size for convenience.
* Skipping altitude adjustment.
* Overloading a dehydrator or guessing dryness.
* Packaging warm dried food and trapping condensation.
* Treating smoked food as shelf stable.
* Using freezer storage without an outage plan.
* Keeping unlabeled food.
* Tasting a questionable jar.
* Giving uncertain food to a neighbor or animal.
* Preserving large volumes before the household has tested the process and will actually eat the result.
16. When to seek expert help
* You cannot locate a tested recipe for the exact food.
* You want to modify acidity, salt, sugar, thickness, ingredients, jar size, or processing method.
* You are preserving meat, poultry, fish, seafood, dairy, eggs, oils with herbs or garlic, or other higher-risk foods.
* A canner gauge, seal, vent, cord, thermostat, or thermometer may be inaccurate.
* A process was interrupted.
* A jar is bulging, leaking, spurting, or suspected of botulism contamination.
* Someone may have eaten suspect food or has neurological or severe gastrointestinal symptoms.
* You plan to sell, donate, ship, or serve preserved food to the public.
* You are adapting a process for a disability, medical diet, high altitude, shared facility, or unusual climate.
For suspected botulism or serious foodborne illness, seek emergency medical help immediately and contact the appropriate public-health authority. Do not wait for symptoms to resolve.
17. Frequently asked questions
Can I use an old family canning recipe?
Use it only if a current authoritative source confirms the same ingredients, proportions, preparation, jar size, process, time, pressure, and altitude adjustment. Preserve the family flavor through safe, tested adaptations or add flavor after opening.
Is a sealed jar always safe?
No. A seal shows that a vacuum formed; it does not prove that the food received a safe process.
Can I pressure-can in a pressure cooker?
Not automatically. Use equipment that meets the tested process requirements and the manufacturer’s intended use.
Can I reduce salt or sugar?
Sometimes these ingredients affect safety and sometimes mainly quality. Change them only when the tested recipe explicitly permits it.
Can I dry food outdoors?
Only when a tested source recommends the method for that specific food and local conditions can meet its temperature, humidity, airflow, contamination, and pest-control requirements. Do not improvise with meat, poultry, fish, or high-risk foods.
Can I preserve food during a power outage?
Avoid beginning a preservation process unless you can complete every safety-critical step with dependable power, fuel, clean water, lighting, ventilation, and equipment. A crisis is not the time to learn a high-risk method.
How long does home-preserved food last?
There is no universal answer. Safety and quality depend on the food, tested method, packaging, processing, seal, storage conditions, and handling after opening. Use the storage guidance attached to the exact tested process.
What if I cannot confirm how a jar was processed?
Do not eat it. When the safety history is unknown, discard it without tasting.
Are home-preserved foods suitable for an emergency kit?
They can be one part of a household pantry when properly processed and stored, but glass is heavy and breakable, some foods require water or cooking, and home preservation adds verification demands. Combine it with commercially packaged foods and a realistic evacuation plan.
18. Emergency food preservation checklist
* Purpose and storage goal defined.
* Current tested source selected.
* Exact food and preparation verified.
* Correct equipment inspected.
* Altitude adjustment confirmed.
* Safe water and utilities available.
* Workspace prepared.
* Children and pets excluded.
* Critical time, temperature, pressure, acidity, and salt controls identified.
* Process completed without unaddressed interruption.
* Cooling or conditioning completed.
* Seals, dryness, packaging, and temperature checked.
* Batch labeled and logged.
* Storage location inspected.
* Rotation date scheduled.
* Outage and disposal rules posted.
* Expert contact identified.
Official sources
National Center for Home Food Preservation
USDA Complete Guide to Home Canning
CDC: Home-Canned Foods and Botulism Prevention
USDA FSIS: Freezing and Food Safety
USDA FSIS: Shelf-Stable Food Safety
FDA: Food Safety During Power Outages
USDA FSIS: Jerky and Food Safety
Editorial and professional review required before publication
* Food-preservation and Cooperative Extension review.
* Food microbiology and public-health review.
* Home-canning and botulism-prevention review.
* Meat, poultry, seafood, curing, smoking, and jerky review where retained.
* Accessibility and occupational-safety review.
* Emergency-management and outage-safety review.
* Legal and regulatory review for sales, donations, interstate distribution, and local requirements.
* Product-compliance review for any Survival Tabs references.
This article is educational. It should be reviewed against current authoritative guidance before publication and maintained whenever official preservation recommendations change.